Deploying Reverb on Laravel Forge
This guide covers every step you need to take to get Reverb up and running in production using Laravel Forge.
While Forge makes it easy to install Reverb configuration in one click, there are a few things we'll need to take care of. Let's get started.
Prefer to watch? We have a free course covering everything in this article.
Deploying
We won't cover the Forge deployment process, so I'm going to assume you already have an application deployed, and it's running on your domain — you just don't have Reverb running yet.
The only thing you'll need to take care of before we start is making sure you have the Reverb configuration set in your .env file (in the Environment tab of your Forge site)
Make sure BROADCAST_CONNECTION is set to reverb:
BROADCAST_CONNECTION=reverb
Also make sure you have the Reverb server configuration in your .env file:
REVERB_APP_ID=984903
REVERB_APP_KEY=a5sokxlpubir0yddvrv6
REVERB_APP_SECRET=pdnzocsflpt3svobwe64
REVERB_HOST="localhost"
REVERB_PORT=8080
REVERB_SCHEME=http

VITE_REVERB_APP_KEY="${REVERB_APP_KEY}"
VITE_REVERB_HOST="${REVERB_HOST}"
VITE_REVERB_PORT="${REVERB_PORT}"
VITE_REVERB_SCHEME="${REVERB_SCHEME}"
We'll come back and change some of these configuration values later.
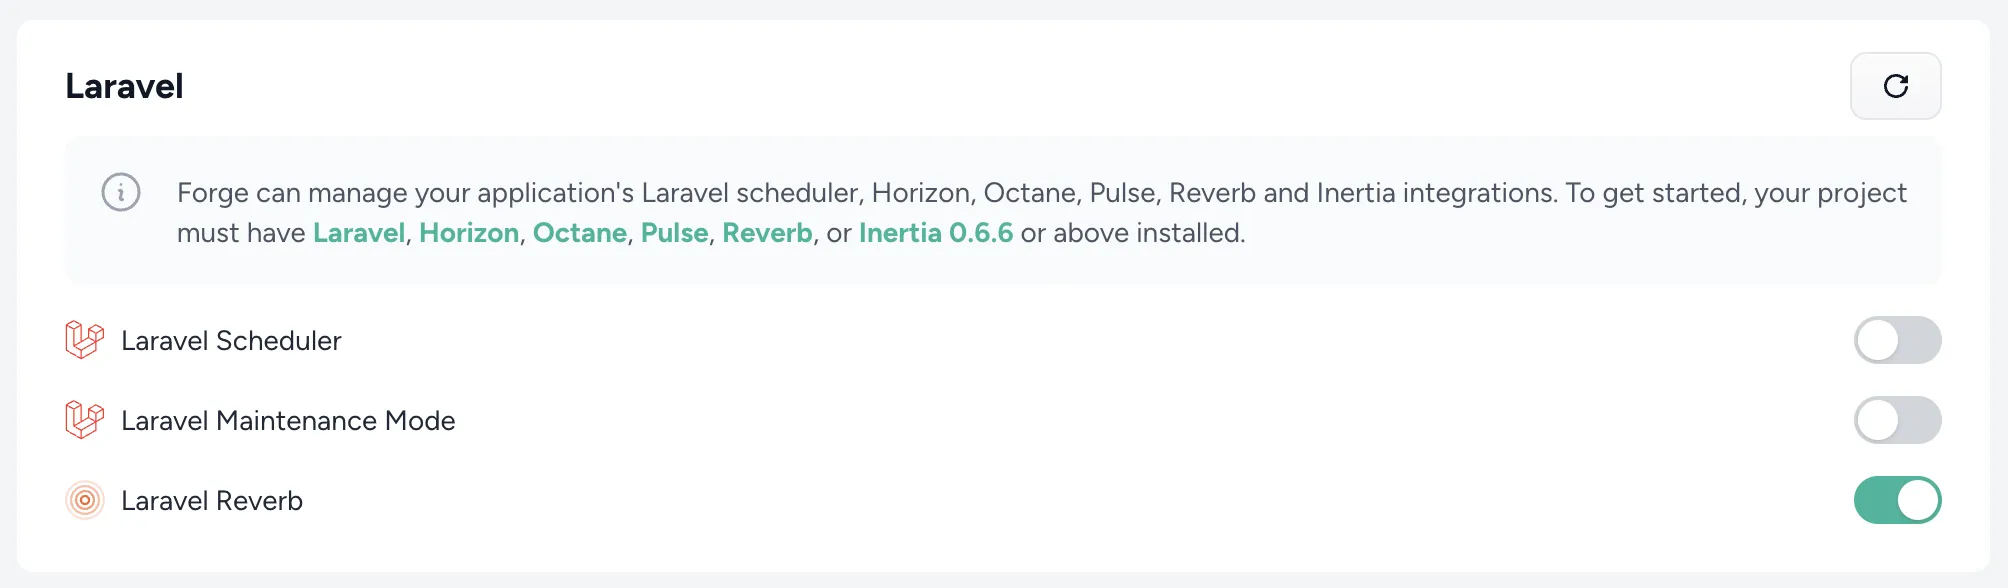
Toggle Reverb
Forge makes it easy to deploy Reverb by setting up most of your configuration.
Head over to your site and visit the Application tab. Then toggle Reverb on.
This will prompt you to fill in some config. The only one we need to touch is the Public Hostname. Set this to ws.[yourdomain]. You can also increase the max concurrent connections if you need to handle more than the default of 1000.
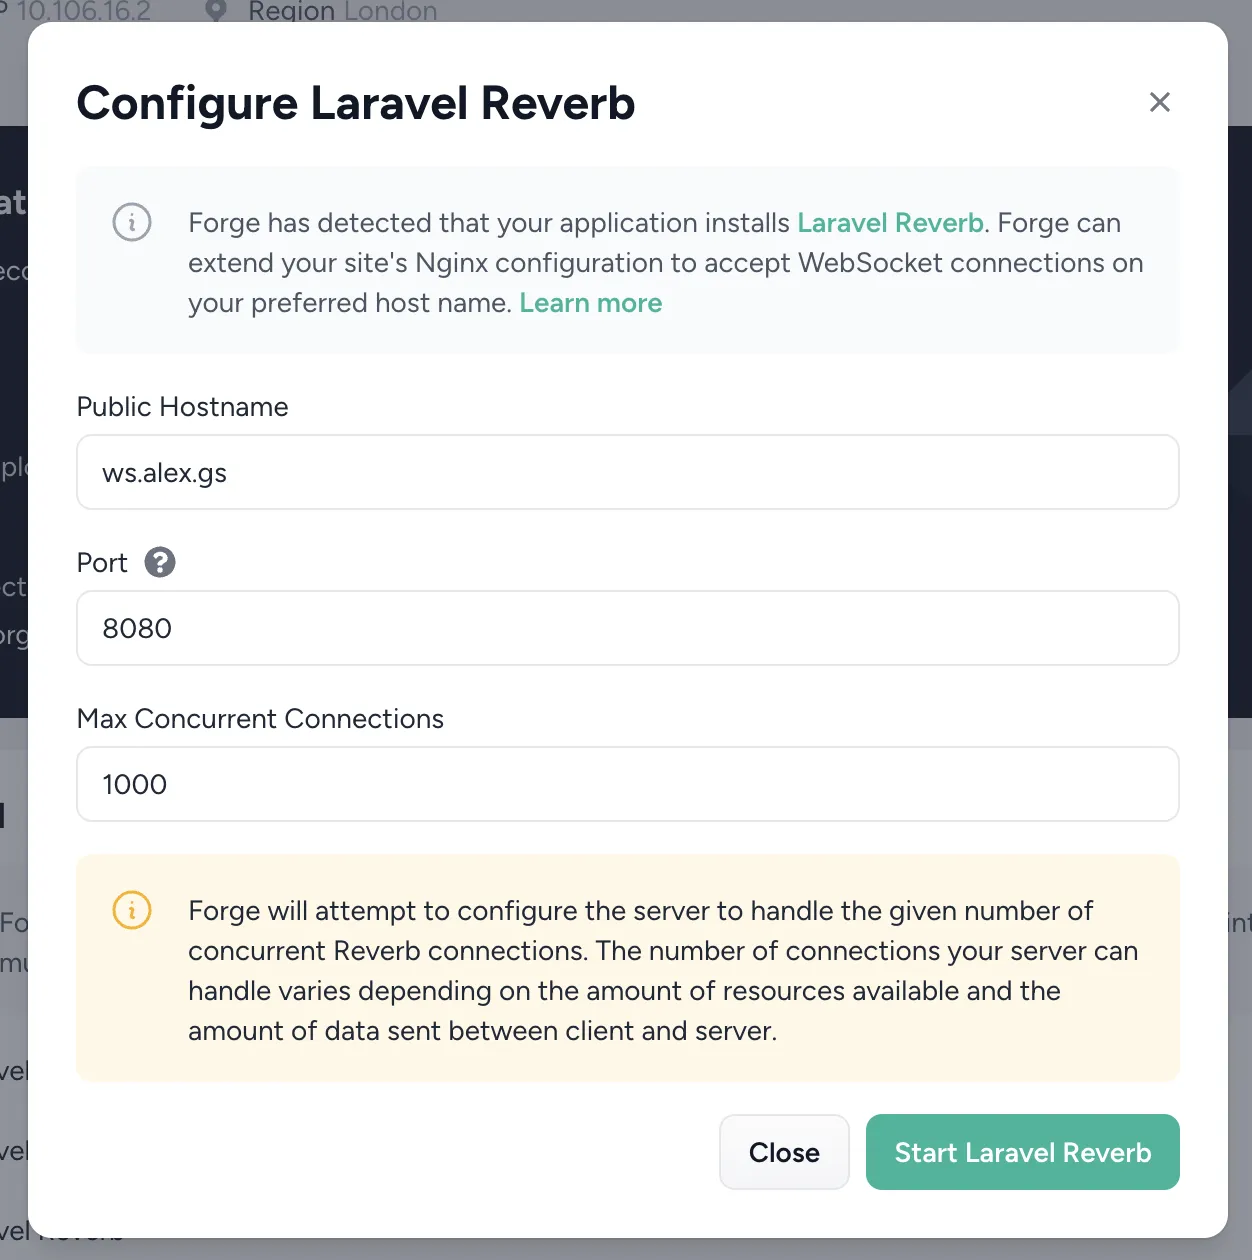
Once you confirm this, Forge will configure your server.
If you look inside your .env file, you'll notice that Forge has already swapped out REVERB_HOST for the one you chose when you toggled Reverb.
REVERB_HOST=ws.alex.gs
Add a CNAME record for ws.[yourdomain]
Because we want our Reverb server to run on the ws subdomain, you'll need to create a CNAME record wherever you manage your DNS.
For me, that's Cloudflare. Here's what the CNAME record looks like:

Once you've added the CNAME, wait until it becomes available (this shouldn't be too long). You can verify this by pinging it from the terminal.
> ping ws.alex.gs

PING alex.gs (143.110.166.157): 56 data bytes
64 bytes from 143.110.166.157: icmp_seq=0 ttl=50 time=33.550 ms
Enable SSL
You may already have SSL running, but you'll also want to ensure it's enabled for this subdomain. You can probably skip this step if you have a wildcard SSL set up for all subdomains.
In Forge, head to the SSL tab of your site. I'll use Let's Encrypt to create a certificate for the main domain and the ws subdomain.
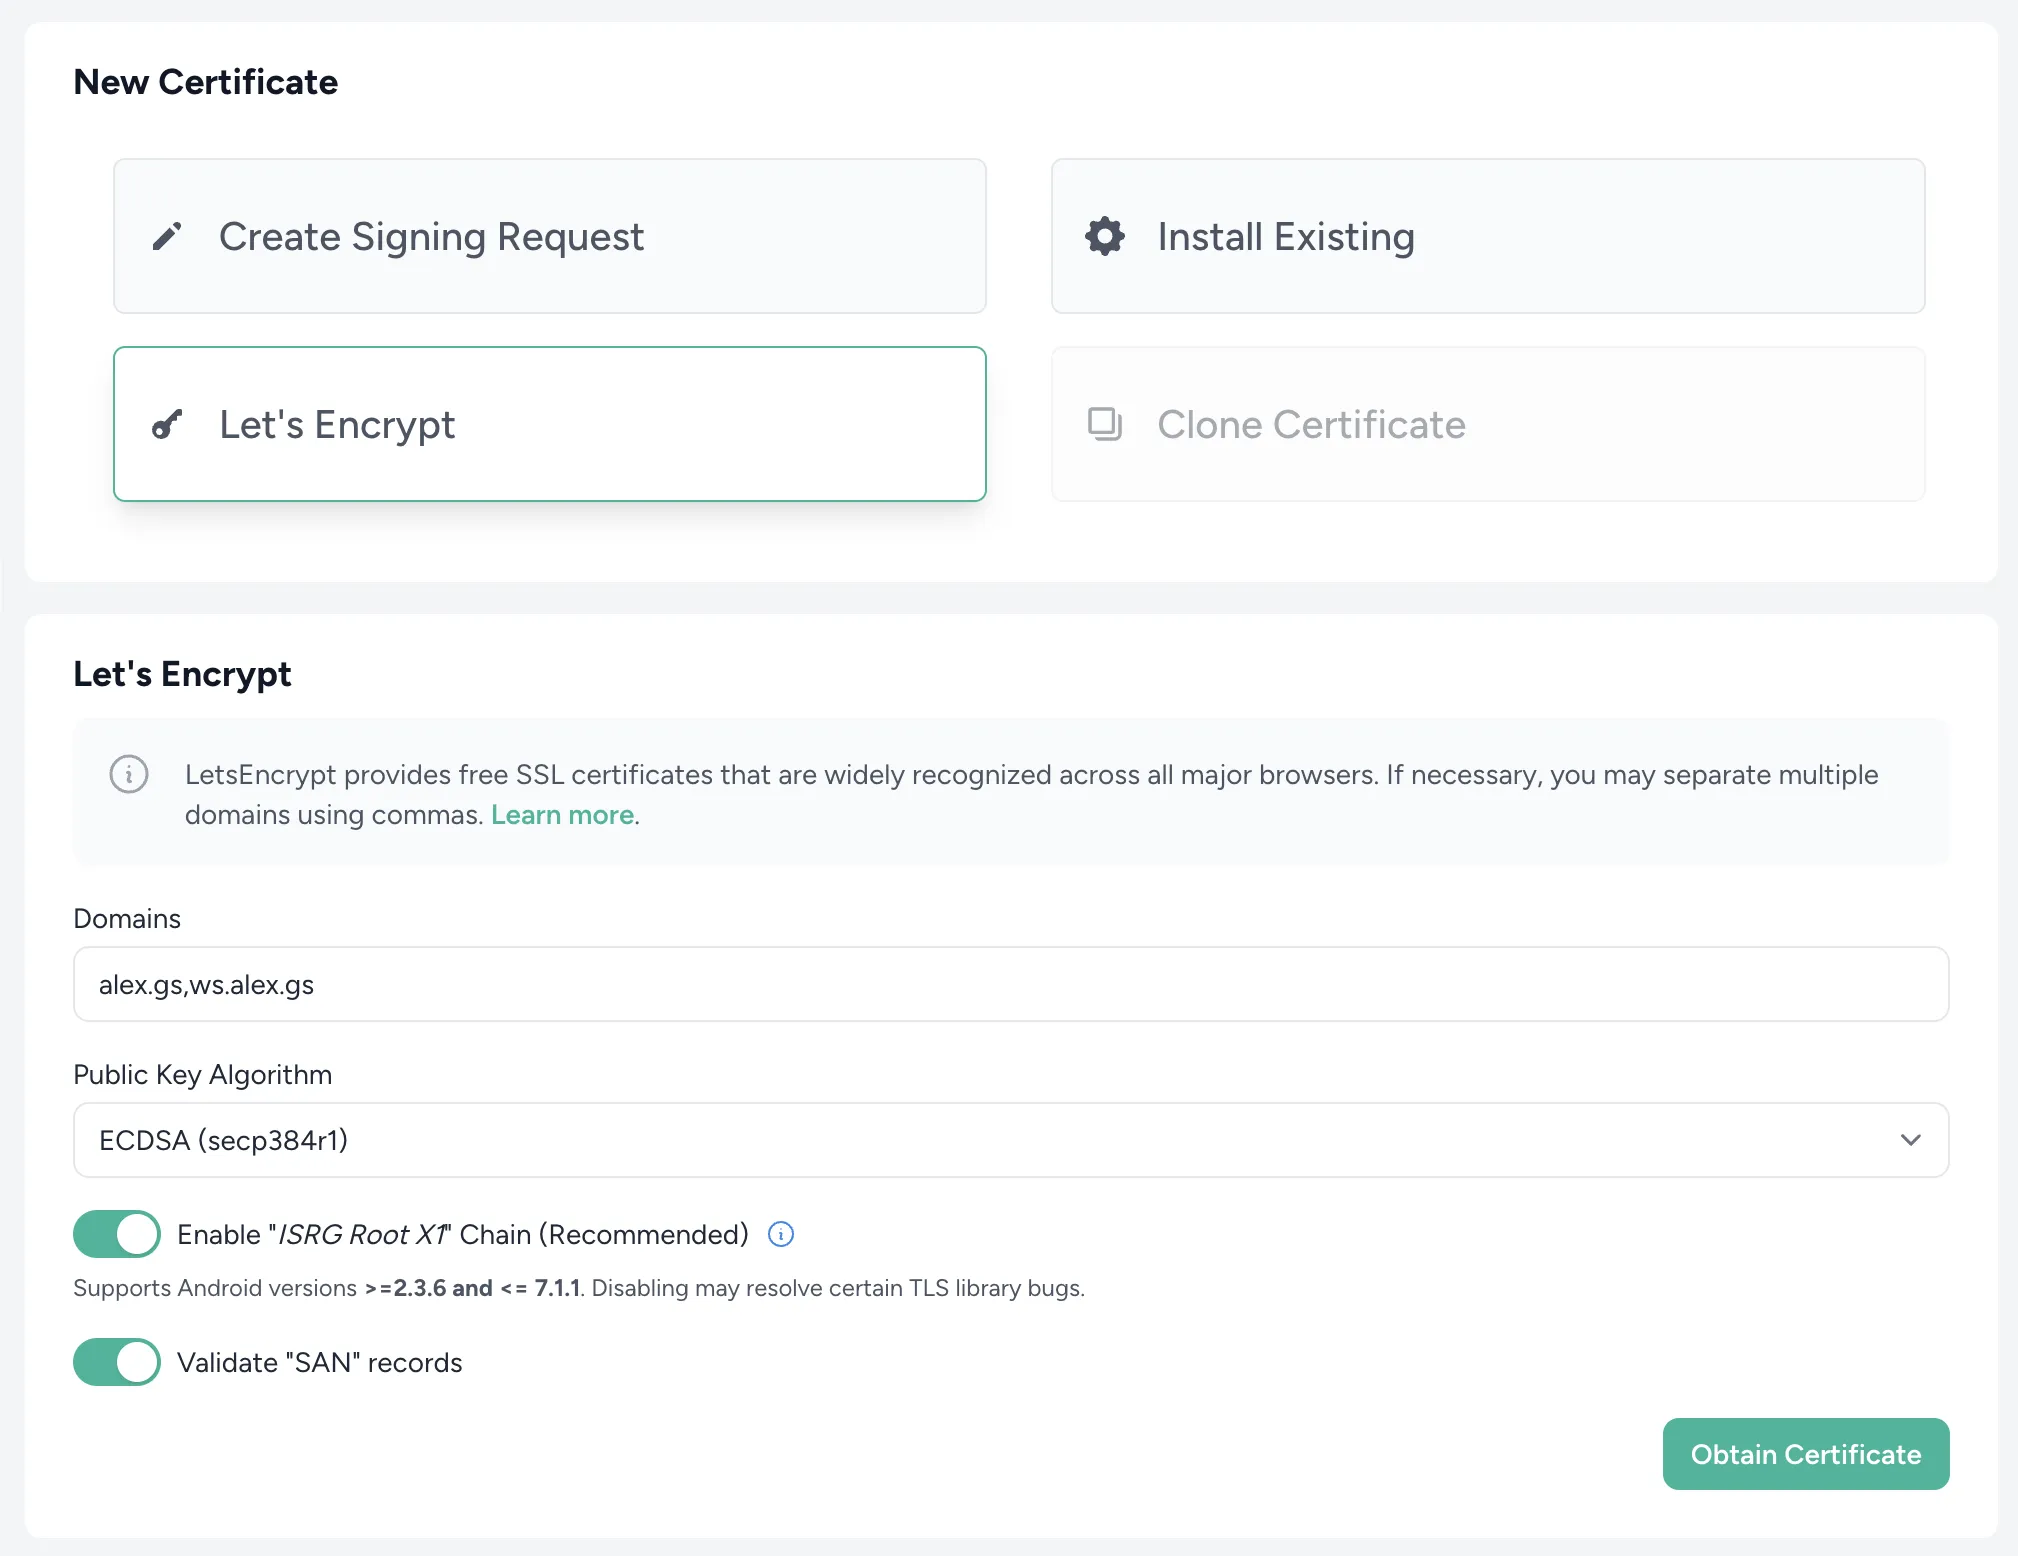
If this step fails and you're using Cloudflare with automatic SSL enabled, you may need to turn it off first and re-enable it once you generate the certificate.
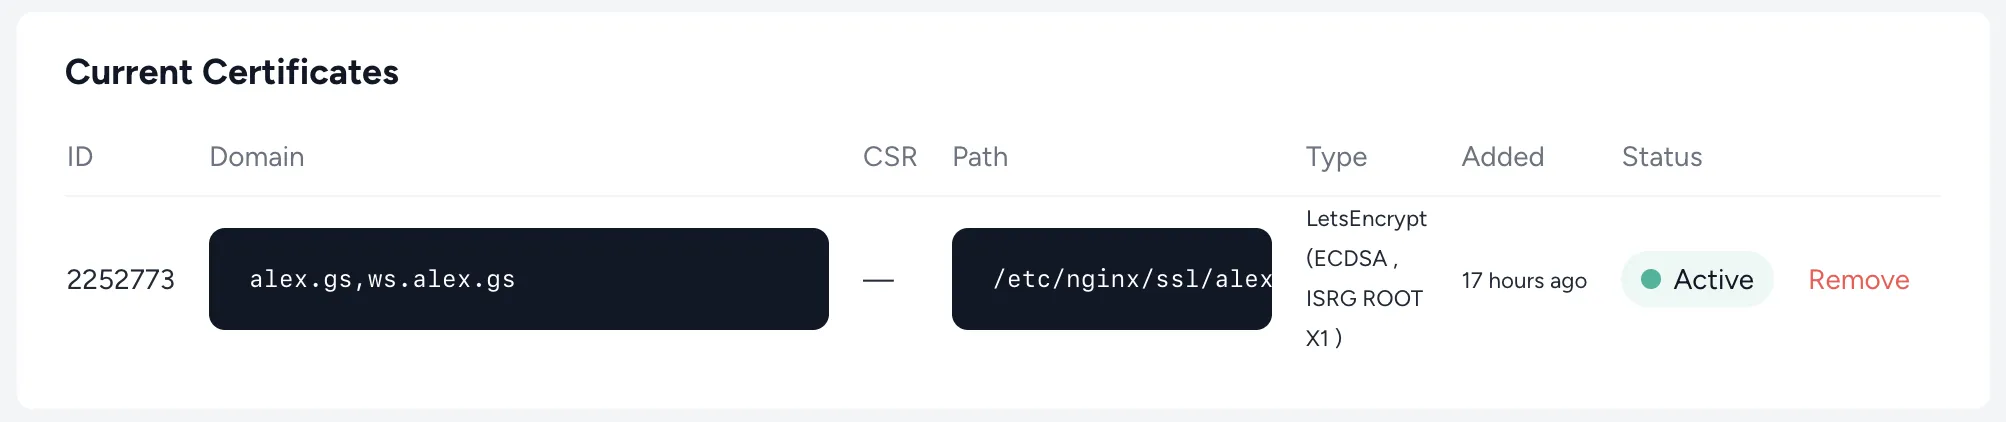
Once the certificate is generated, you should see it enabled:
Update Reverb config
Now that SSL is enabled for your ws subdomain head back over to your .env file and update the REVERB_PORT and REVERB_SCHEME
REVERB_PORT=443
REVERB_SCHEME="https"
The next time we restart Reverb, these new configuration values will take effect.
Rebuild assets and restart Reverb
When we installed Reverb through Forge, this automatically registered a Daemon on our Forge server. Head to your server Daemons tab, and you should see something like this:
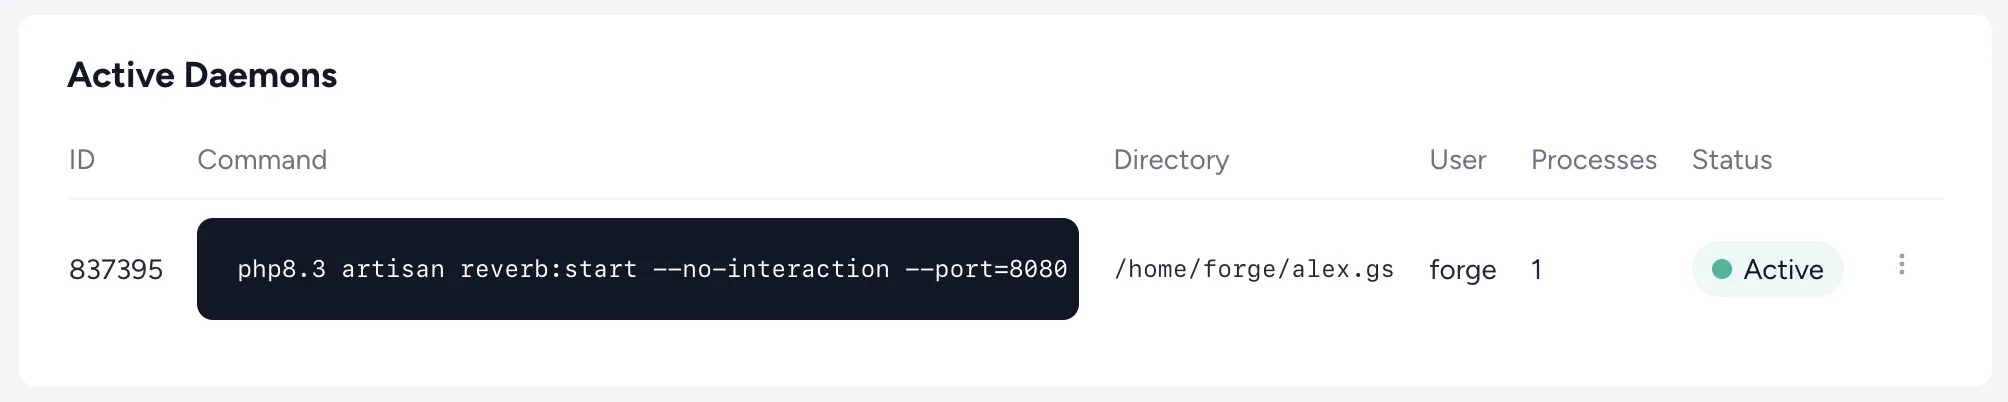
You can restart your Reverb server anytime you need to here. However, Forge also added an automatic restart command in your deploy script!
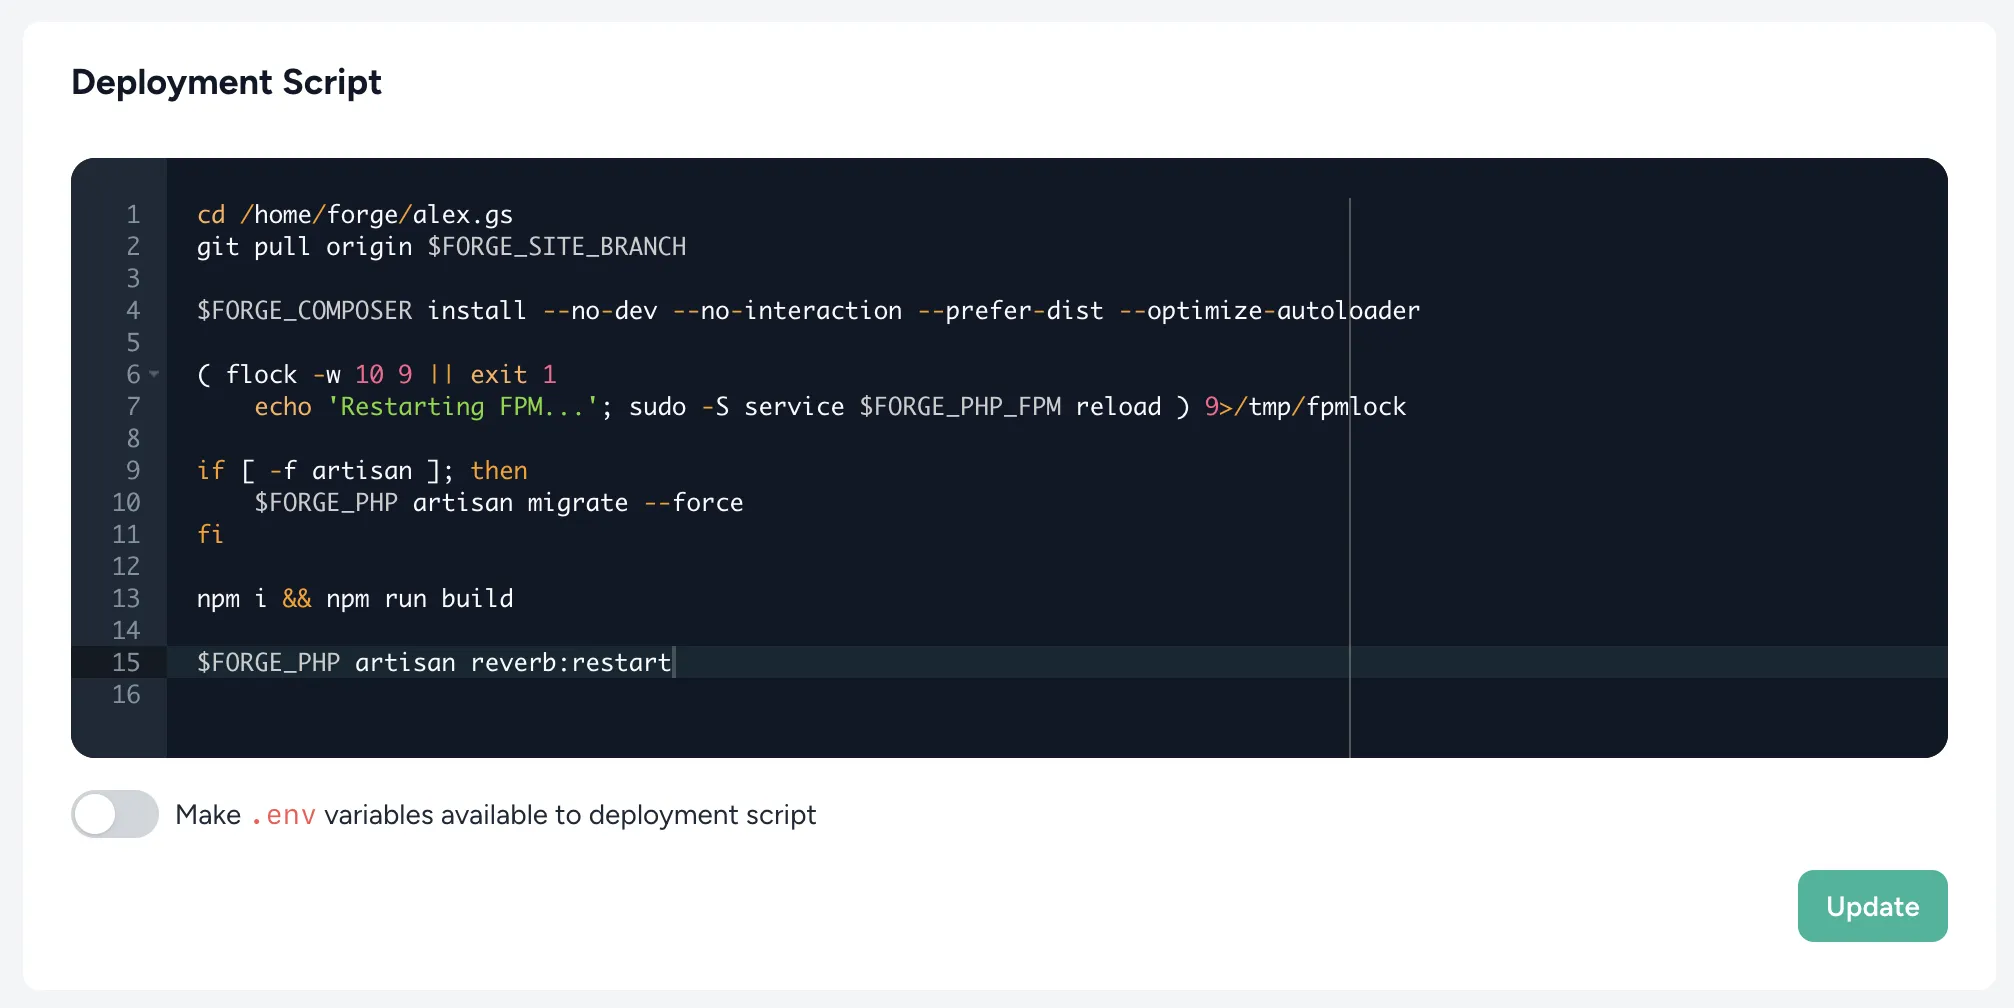
Because of this, all we need to do is redeploy our application. This will:
- Rebuild your project with Vite (as long as you're running
npm i && npm run devin your deployment script), which pulls in the new Reverb config from.env - Restart your Reverb server to run with the new scheme and port.
So, hit deploy!
Reverb should now be up and running
At this point, you should be able to connect to your Reverb server with Laravel Echo and broadcast events from your application.
If you've encountered any issues while following this guide, please let me know so I can help you out and keep this article up-to-date for any other scenarios!
Thanks to Marc Hampson for running through these steps first and pointing out some of the issues along the way.
